Glue-down vinyl floor tiles are a practical choice for many homes. They are popular in bedrooms, kitchens, hallways, laundry rooms, and other low- to medium-traffic areas because they look neat, feel comfortable underfoot, and can be easier to maintain than some other flooring options.
If you are learning how to install vinyl floor tiles with glue, the most important thing to remember is this: good preparation leads to a better result. A clean, dry, smooth floor makes installation much easier and helps the tiles stay in place for a long time.
What You Need Before Installing Vinyl Floor Tiles
Essential Materials
Before you begin, gather everything you need. Having your tools ready saves time and keeps the job running more smoothly.
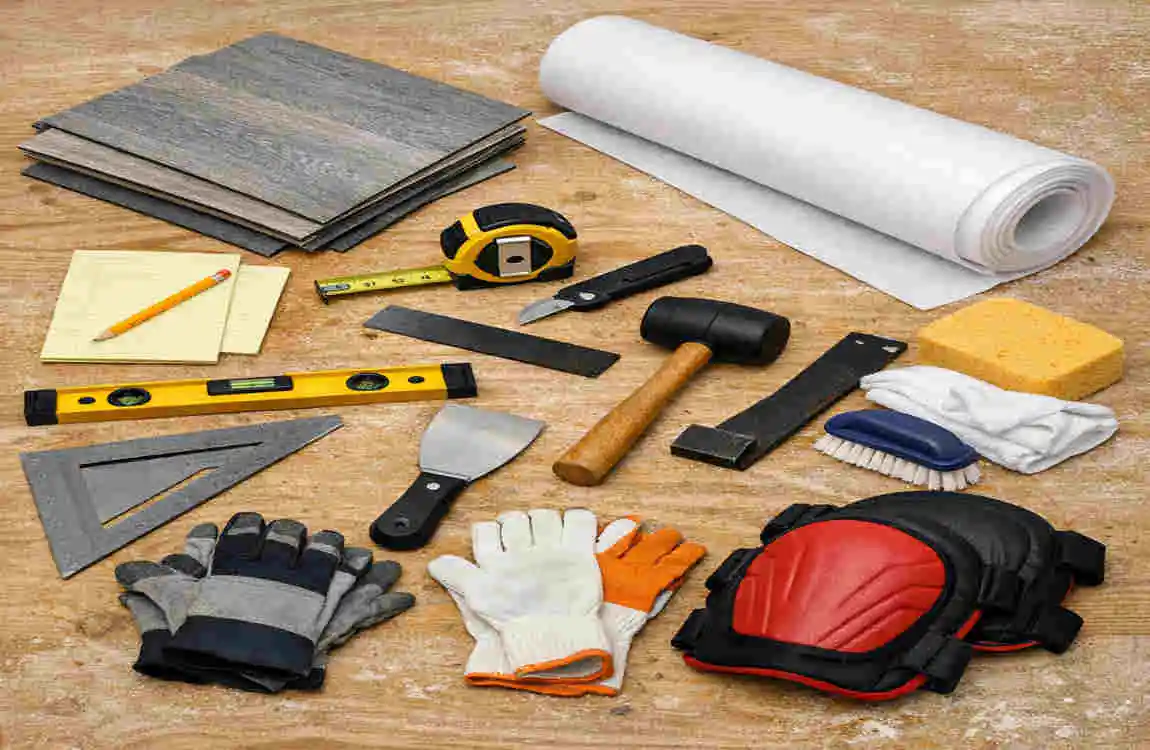
You will usually need:
- Vinyl floor tiles
- Vinyl-floor adhesive
- Notched trowel or adhesive applicator
- Measuring tape
- Utility knife
- Straightedge
- Pencil or chalk line
- Floor roller
- Cleaning supplies
It is always smart to check the product instructions first. Some vinyl tiles and adhesives work a little differently, so the manufacturer’s directions should guide your final choices.
Prepare the Work Area
Start by clearing the room. Remove furniture, rugs, and anything else that may get in the way. Then clean the floor carefully.
You want to remove dust, grease, dirt, and loose debris. Even small particles can affect how well the adhesive works. If the room is too cold or too humid, let the flooring materials sit in the room for a while so they can adjust to the temperature.
This step may seem small, but it makes a big difference.
Check the Subfloor
The subfloor is the base under your tiles. It must be clean, dry, smooth, and strong.
If you notice cracks, holes, bumps, or soft spots, repair them before you start. Vinyl tiles show unevenness more than many people expect, so the flatter the surface, the better the final look.
Also, watch for moisture. If the subfloor has damp areas, the adhesive may not bond properly. That can lead to loose tiles later.
Prepare and Plan the Vinyl Tile Layout
Measure the Room
Measure the length and width of the room carefully. This helps you estimate how many tiles you need.
It is also wise to buy a few extra tiles. Why? Because you may need them for cuts, mistakes, and future repairs. Having a small surplus gives you peace of mind.
Find the Starting Point
A good layout makes the whole project look more professional. Do not start laying tiles randomly.
Instead, create a straight reference line. This helps keep the rows even and balanced. Try not to begin right against a wall if the wall is uneven, because many walls are not perfectly straight.
You also want to avoid ending up with tiny strips of tile along the edges of the room. That can look awkward. A little planning now saves frustration later.
Dry-Fit the Tiles
Before you apply glue, place a few tiles on the floor without adhesive.
This helps you check:
- Pattern alignment
- Tile direction
- Edge spacing
- Where difficult cuts will go
Dry-fitting also gives you a chance to spot problems before they become permanent. Mark any tricky areas ahead of time so you are ready when you start gluing.
How to Install Vinyl Floor Tiles With Glue
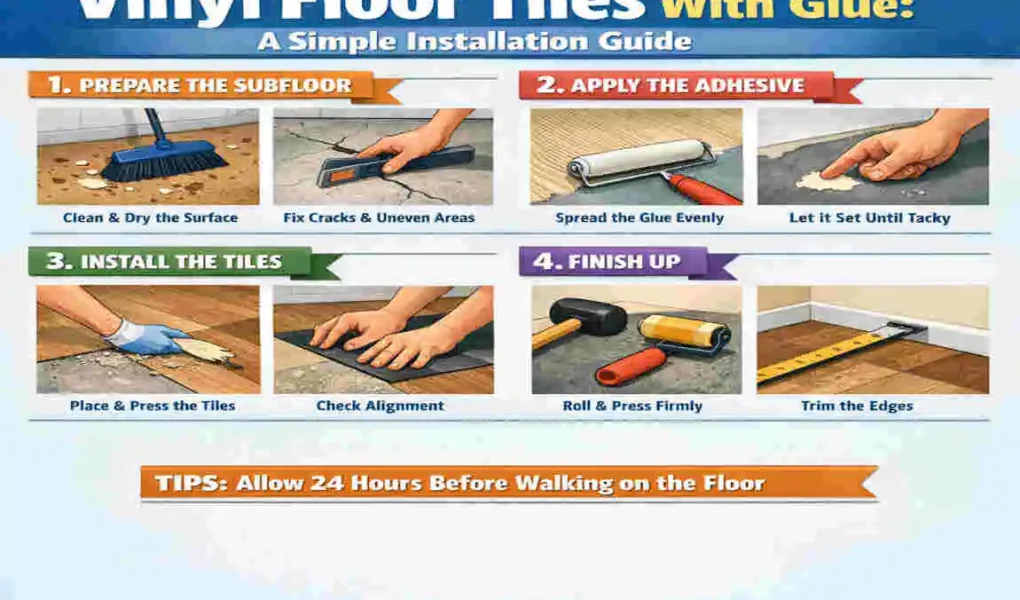
Apply the Adhesive
Now you are ready for the main part of the job.
Follow the adhesive instructions exactly. Some adhesives need to sit for a short time before the tile goes down, while others work differently. Use the correct tool, usually a notched trowel, to spread the glue evenly.
Do not cover too large an area at once. Adhesive has a working time, meaning it can lose its effectiveness if you wait too long. Work in manageable sections so the glue stays ready for the tiles.
Place the First Tiles
Start from your reference line and place the first tile carefully. This first row matters a lot because it sets the direction for the rest of the floor.
Press each tile firmly into the adhesive. Keep the seams neat and consistent. If the first tiles are off, the whole floor can drift out of alignment.
Take your time here. A slow, careful start often gives the best result.
Continue Across the Floor
Once the first row is secure, keep working across the room in sections.
Check alignment often. Small shifts can happen if you move too quickly. If a tile looks out of place after the adhesive starts setting, do not keep pushing it around. That can weaken the bond.
Work with a steady rhythm. This helps keep the floor level and neat.
Roll the Installed Flooring
After the tiles are in place, use a floor roller if the manufacturer recommends it. Rolling helps press the tiles more firmly into the adhesive.
This improves contact between the tile and the floor and can reduce the chance of lifting later. Pay special attention to edges and seams, since those are the spots most likely to need extra pressure.
How to Cut Vinyl Floor Tiles Around Edges and Corners
Straight Cuts
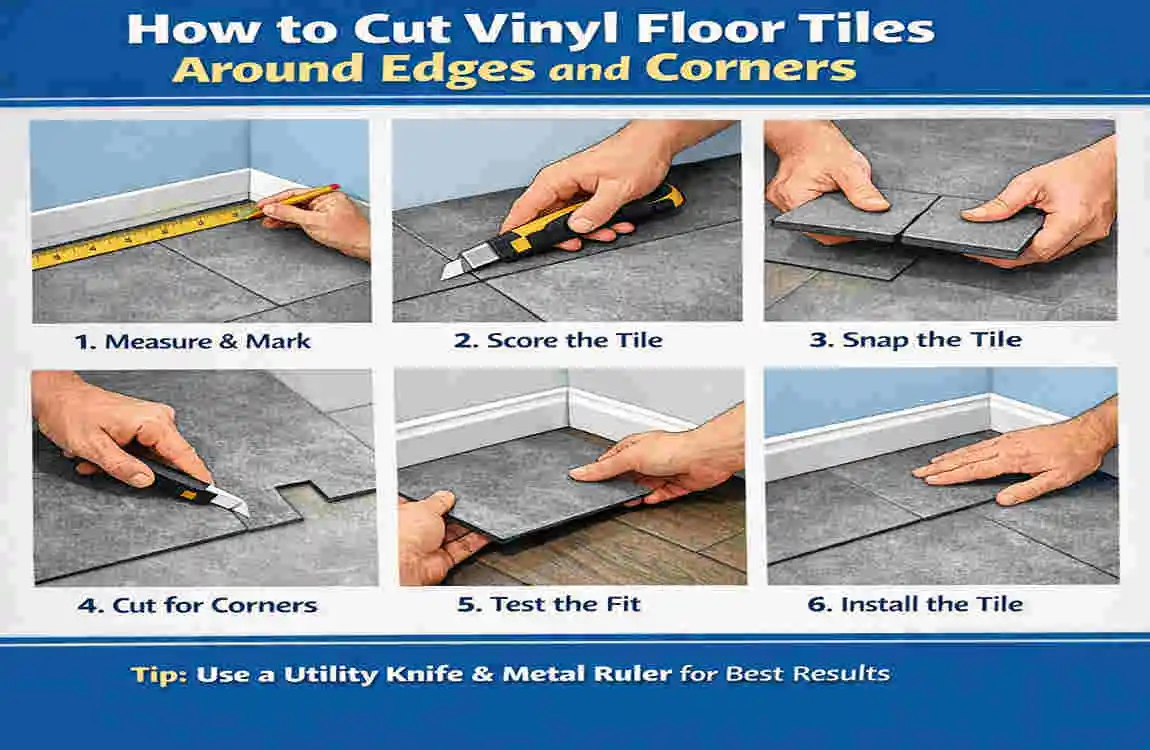
Most rooms need edge cuts. Measure carefully, then mark the tile clearly before cutting.
Use a straightedge and utility knife for clean, controlled cuts. Do not force the blade. A careful cut usually gives a better finish than rushing through the material.
Cutting Around Door Frames
Door frames can be one of the trickiest parts of the job. Measure the area carefully and mark it clearly on the tile.
In some cases, trimming the bottom of the door frame gives a cleaner finish than cutting around it. That makes the flooring look more seamless and professional.
Working Around Pipes and Irregular Shapes
For pipes, corners, and unusual shapes, make a paper template first if needed. Then transfer that shape to the tile.
This is one of those moments where measuring twice really helps. A small error can waste a tile, while a careful template can save time and material.
Common Mistakes to Avoid When Installing Glue-Down Vinyl Tiles
Even a simple flooring project can go wrong if you miss the basics. Here are the most common mistakes to avoid:
- Installing over a dirty or uneven subfloor
- Ignoring moisture problems
- Skipping layout planning
- Using the wrong adhesive
- Applying too much or too little glue
- Failing to align the first tiles properly
- Walking on the floor too soon
- Ignoring curing instructions
Finishing, Cleaning, and Maintaining Vinyl Floor Tiles
Allow the Adhesive to Cure
Curing time matters a lot. Even if the tiles feel secure, the adhesive may still need time to set fully.
Follow the instructions on the adhesive and flooring package. Avoid moving heavy furniture onto the new floor too soon. If you rush this part, you may damage the bond before it fully strengthens.
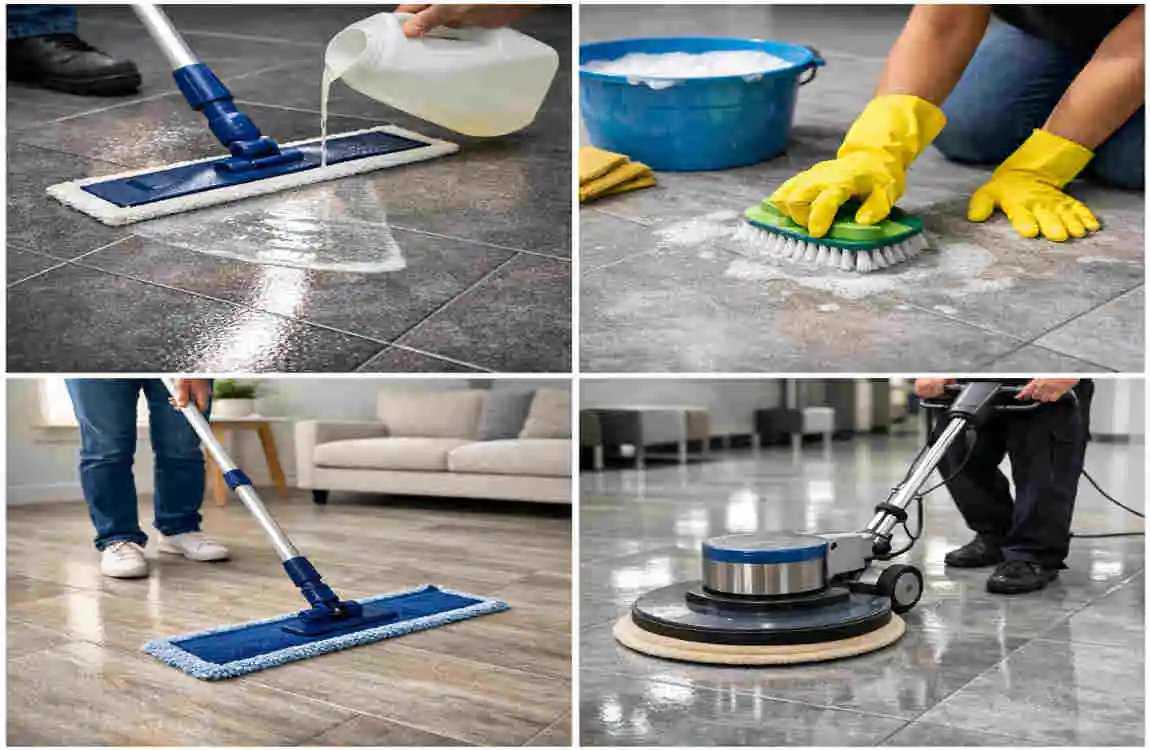
Clean the New Floor
Once the floor is ready, clean it gently. Remove any dust, glue residue, or small debris from the installation.
Use cleaning products that are safe for vinyl flooring. Try to avoid using too much water, because excess moisture is not helpful for vinyl floors or the adhesive underneath.
Maintain the Flooring
Vinyl tile floors are fairly easy to care for, but regular maintenance still matters.
Here are a few simple habits to follow:
- Sweep or vacuum regularly
- Clean spills quickly
- Use furniture pads
- Do not drag heavy furniture
- Replace damaged tiles when possible
These small steps help your floor stay attractive for longer.
FAQs About Installing Vinyl Floor Tiles With Glue
Can you glue vinyl floor tiles directly to the floor?
Sometimes yes, but it depends on the condition of the subfloor and the product instructions. The floor must be clean, stable, dry, and suitable for adhesive bonding.
How long does glued vinyl flooring take to set?
It depends on the adhesive, the tile type, and the room conditions. Some products set faster than others, so always follow the manufacturer’s curing time.
Do you need underlayment under glue-down vinyl tiles?
Usually, glue-down vinyl tiles go directly onto a properly prepared subfloor. They do not automatically need separate underlayment unless the product instructions say otherwise.
Can vinyl tiles be installed over old flooring?
Sometimes they can, but only if the old floor is clean, flat, stable, and approved by the manufacturer. Loose or damaged flooring should not be used as a base.
Why are my vinyl tiles coming loose after installation?
This often happens because of poor subfloor prep, moisture, the wrong adhesive, or weak adhesive application. Timing also matters, so the tiles should not be disturbed too soon.
How do you remove glued vinyl floor tiles?
You usually need to loosen the adhesive carefully and lift the tiles one by one. The best method depends on the glue and the type of flooring.
Is installing glue-down vinyl tiles difficult for beginners?
It can be a very manageable DIY project. If you prepare the floor properly and follow the directions carefully, the process is usually straightforward.
| Step | What to Do | Quick Tip |
|---|---|---|
| Prepare the Floor | Clean, dry, and smooth the surface. | Remove dust, dirt, and old adhesive. |
| Measure the Room | Measure the length and width to estimate tile needs. | Buy about 5–10% extra for cuts and waste. |
| Plan the Layout | Mark a centerline and arrange tiles before gluing. | Start from the center for a balanced look. |
| Apply Adhesive | Spread vinyl-floor adhesive evenly according to the product instructions. | Avoid applying too much glue. |
| Place the Tiles | Carefully press each tile into position. | Keep seams tight and aligned. |