Lifeproof flooring is popular because it looks good, feels durable, and works well in busy homes. Many homeowners like it because it handles everyday wear, spills, and foot traffic better than some other flooring choices. It is also sold as a simple click-lock product, which makes it seem easy to install.
But even a flooring product made for easy use can run into problems if the room isn’t prepared correctly. That is where Lifeproof flooring installation problems often begin. Uneven subfloors, bad layout, damaged locking edges, and moisture issues can all cause trouble later.
What Are the Most Common Lifeproof Flooring Installation Problems?
Uneven or Unprepared Subfloor
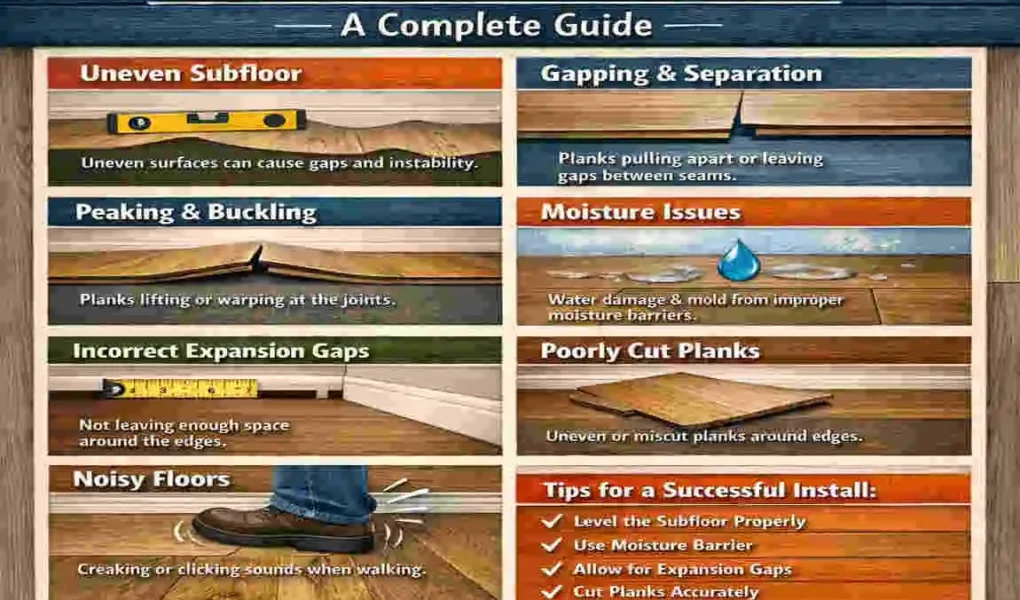
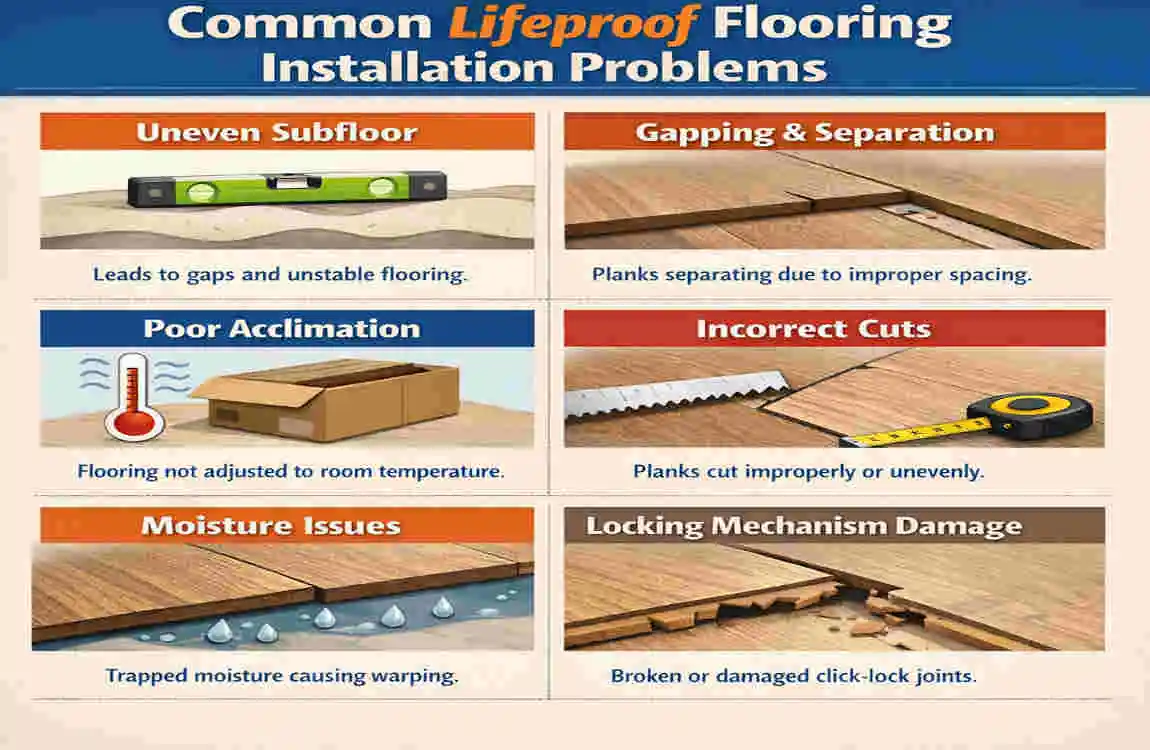
One of the biggest causes of flooring trouble is the subfloor. If the surface underneath is not level, clean, and solid, the planks may not sit properly.
A floor with bumps, dips, dust, or leftover debris can make the planks feel unstable. Over time, this may lead to gaps, movement, squeaks, or loose edges. Even small subfloor flaws can affect how the finished floor looks and feels.
Gaps Between Flooring Planks
Gaps are a very common problem. They can appear right after installation or later as the room changes with the seasons.
Sometimes the planks were not locked tightly enough. In other cases, the flooring was installed too fast, or the room conditions changed after the floor went down. If the floor was forced together badly, the pieces may separate over time.
Planks Not Locking Properly
Lifeproof flooring usually uses a click-lock system. That means the plank edges are designed to fit together in a specific way.
If the locking edges are damaged, dirty, or installed at the wrong angle, the pieces may not connect correctly. This can leave weak spots in the floor. It may also make the finished surface feel uneven.
Flooring Moving or Shifting
A floor should feel stable underfoot. If planks move, slide, or shift, something is wrong underneath or during installation.
This can happen when the subfloor isn’t prepared well, when there is too much moisture, or when expansion space wasn’t left around the room. Movement is a sign that the flooring isn’t fully secured.
Squeaking or Clicking Sounds
Noise is another sign that something is off. A floor may squeak, click, or pop when you walk on it.
This can happen for several reasons. The planks may not be fully locked, the subfloor may be loose, or the flooring may be rubbing against nearby walls or objects. Finding the source of the sound is the first step toward fixing it.
Why Does Lifeproof Flooring Separate or Develop Gaps?
Temperature and Humidity Changes
Even strong flooring can react to changes in the room. When the air warms or gets wetter, materials can expand. When the air dries out or cools down, they can contract.
If the flooring does not have enough room to move naturally, it may push against itself and create gaps or lifted areas. This is one reason why the room should stay within the recommended conditions before and after installation.
Improper Installation
Poor installation is another major reason for gaps. If planks aren’t locked in properly, the floor may look fine at first but start separating later.
This often happens when the installer rushes, skips steps, or does not check alignment often enough. A small mistake in one row can affect the rest of the floor.
Subfloor Movement
If the surface below the flooring moves, the planks above it can shift too. A weak wood subfloor, a cracked concrete slab, or loose fasteners can all create movement.
When the base is unstable, the planks may not stay joined tightly. That can lead to open seams and visible gaps.
How to Fix Small Gaps
If the gap is small, you may be able to fix it without replacing the entire floor.
Start by checking whether the plank is damaged or just out of place. If the locking edge is still good, you may be able to reconnect the plank. If the edge is bent or broken, you may need to replace it.
For a few isolated spots, a careful repair may solve the issue. If gaps keep coming back, it is better to look at the subfloor, expansion space, and installation method before trying again.
Lifeproof Flooring Problems Caused by Poor Subfloor Preparation
Concrete Subfloor Problems
Concrete can seem solid, but it can still have cracks, bumps, or moisture issues. If the slab is not ready, the flooring on top may not perform well.
A rough concrete surface can create uneven pressure on the planks. Moisture in the slab can also cause long-term trouble. Before installation, inspect, clean, and level the concrete as needed.
Wood Subfloor Problems
Wood subfloors can also cause problems if they are loose, squeaky, or uneven. Loose boards and old nails can make the surface unstable.
If the wood underneath moves, the flooring above it may shift too. That can lead to squeaks, gaps, or weak locking areas. Before installing the new floor, fix soft spots, tighten fasteners, and remove anything that sticks up.
Moisture Issues
Moisture is one of the biggest hidden causes of flooring failure. Even if the floor looks fine on day one, moisture problems can show up later as lifting, bending, or separating.
Bathrooms, kitchens, basements, and ground-level rooms need extra care. Check the area carefully before installation because moisture problems are often expensive to repair later.
How to Prepare the Subfloor Correctly
A good installation starts with a clean and stable base.
Here are the main steps:
- Clean the surface and remove dust, glue, nails, and debris.
- Check for level issues and fill dips or sand high spots.
- Repair damaged areas so the base is strong and steady.
- Let materials adjust to the room if the product instructions call for it.
When the subfloor is ready, the flooring has a much better chance of lasting well.
Common Installation Mistakes and How to Avoid Them
Installing Over an Unsuitable Surface
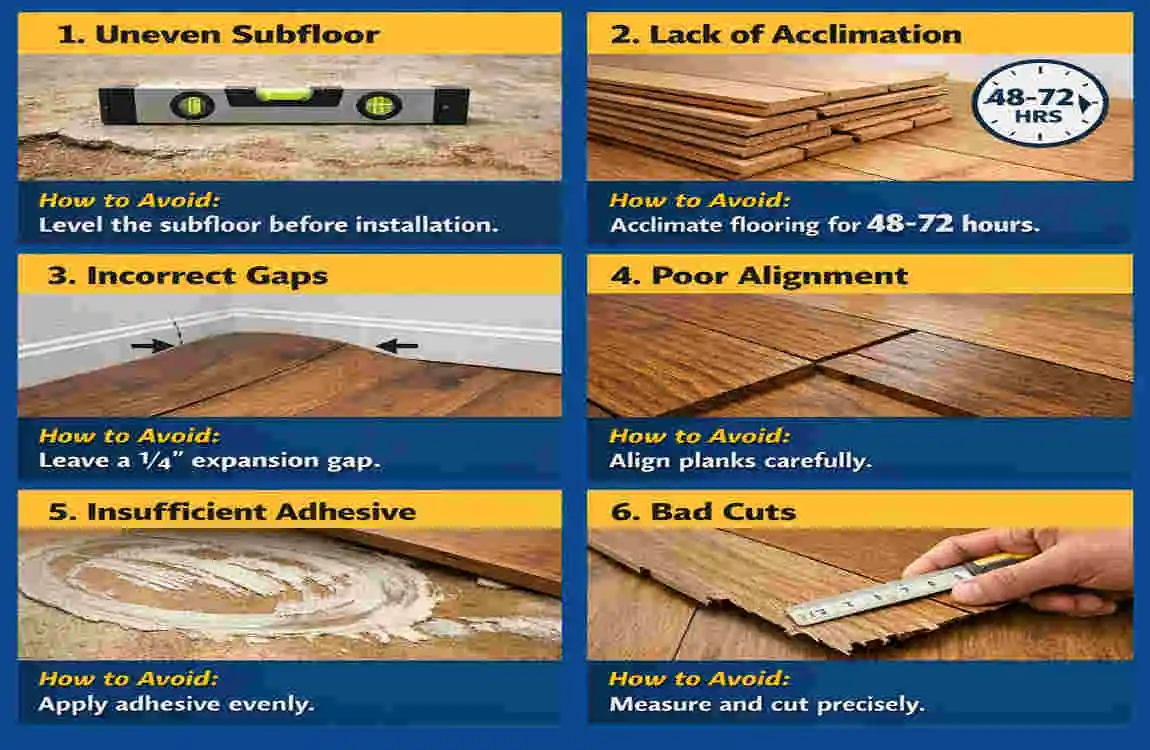
Not every surface is ready for new flooring. Old carpet, loose vinyl, damaged wood, or badly cracked concrete may need removal or repair first.
If the surface below isn’t suitable, the new floor may look uneven or fail sooner than expected. Always check the base before starting.
Incorrect Plank Layout
Layout matters more than many people think. The first row sets the tone for the entire floor.
If the starting line is off, the rest of the room can end up crooked or awkward. Narrow slivers at the wall are another common problem. Careful measuring before installation helps avoid this.
Not Following Expansion Requirements
Every floating floor needs a little room to move. If you install the planks too tightly against walls, cabinets, or posts, they may press against fixed objects and buckle.
This is one of the easiest mistakes to avoid, yet it still happens often. Expansion space is not optional. It is part of the design.
Using the Wrong Tools or Techniques
You do not need complicated tools to install this type of flooring, but you do need the right ones. A tapping block, pull bar, spacers, and a cutter are common basics.
Using too much force can damage the locking edges. Once the edge is damaged, the plank may never lock the same way again. Gentle, careful work usually gives the best results.
Failing to Check Each Plank
Inspect every plank before installing it. If one piece is bent, chipped, or warped, set it aside.
A damaged plank may not show its problem until it is already in the floor. That can waste time and lead to extra repairs.
How to Fix Lifeproof Flooring Installation Problems
Fixing Gaps and Separated Planks
First, find out why the gap happened. If the cause is movement, moisture, or a poor layout, the gap may return after a simple repair.
If the plank is still in good shape, you may be able to reconnect it carefully. If the locking edge is damaged, replacement is usually the better choice. Do not force the pieces together if they resist.
Fixing Raised or Buckled Flooring
When flooring lifts or buckles, check expansion space first; the floor may be pressing against a wall, cabinet, or heavy object.
Moisture is another possible cause. If moisture is present underneath, you must find the source before the repair will last. Fixing only the top layer will not solve the bigger issue.
Fixing Damaged Locking Edges
A small chip may not always ruin a plank, but a broken edge often does. If the locking area is too damaged, the plank may not stay tight.
In some cases, you can reuse a plank elsewhere if the damage is minor. But if the edge will not hold, replacing the piece is usually the safest fix.
Fixing Noisy or Moving Flooring
Noise often points to movement. Check the subfloor first, then look for loose joints or areas where the floor rubs against something it shouldn’t.
If the sound comes from a single area, the problem may be small. If the whole floor is noisy, the installation may need a closer look.
When to Replace Instead of Repair
Sometimes repair is not enough. If the plank is badly damaged, warped, or repeatedly coming apart, replacement is the better option.
You should also think about replacement if the same issue appears in many places. That usually means the problem is not just one plank. It may be the subfloor, layout, or installation method.
How to Prevent Lifeproof Flooring Installation Problems
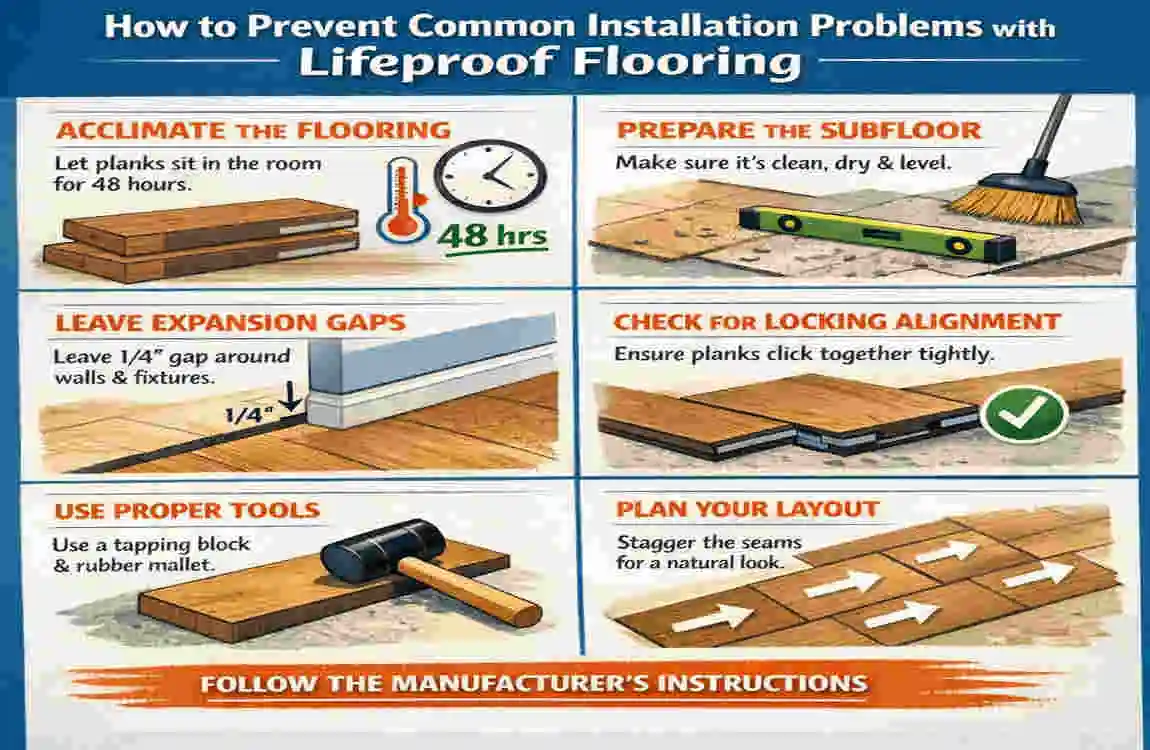
Prepare the Room Before Installation
Good results begin before the first plank is placed. Clean the room, inspect the floor, and gather your tools in advance.
Make sure the subfloor is ready, and the materials are organized. A calm setup usually leads to a cleaner installation.
Follow the Manufacturer’s Installation Instructions
This point matters a lot. Different flooring products may have different rules for underlayment, spacing, room conditions, and installation steps.
If you skip the instructions, you may create problems without realizing it. Product-specific guidance is one of the best ways to avoid lifeproof flooring installation problems.
Allow Proper Expansion Space
Leave space around the edges of the room and around fixed objects. This gives the floor room to adjust as conditions change.
Without that space, the flooring can push against walls and lift. That is an avoidable problem if you plan.
Maintain Suitable Indoor Conditions
Try to keep the room within normal living conditions before and after installation. Big swings in heat and moisture can affect the floor.
A stable room helps the planks stay in place and reduces the chance of gaps or movement later.
Inspect the Finished Floor
Once the floor is complete, walk across it slowly. Listen for sounds. Look for movement, gaps, or raised edges.
Catching a problem early is much easier than waiting until the floor gets worse.
Frequently Asked Questions About Lifeproof Flooring Installation Problems
Why is my Lifeproof flooring separating?
Separation usually happens because of poor installation, subfloor movement, temperature changes, or not enough expansion space. Often, the cause is a mix of two or more issues.
Why won’t my Lifeproof flooring click together?
The locking edge may be damaged, dirty, or installed at the wrong angle. If the plank will not connect easily, do not force it. Check the edge and try again carefully.
Why is my Lifeproof floor lifting?
Lifting often means the floor has no room to expand, or there may be moisture or subfloor problems. It can also happen if the floor was installed too tightly.
Can uneven floors cause problems with Lifeproof flooring?
Yes. Uneven floors can lead to gaps, movement, noise, and poor locking. The subfloor should be level enough before installation begins.
How do I fix gaps in Lifeproof flooring?
Start by finding the cause. Then reconnect the planks if possible or replace damaged pieces if needed. If the gaps keep returning, check the subfloor and expansion space.
Does Lifeproof flooring need an underlayment?
That depends on the specific product. Some floors already include padding, while others may need extra underlayment. Always check the installation instructions.
How long does Lifeproof flooring take to install?
It depends on the room size, prep work, and installer experience. A simple room may take less time, but subfloor repairs can add several hours or more.
| Installation Problem | Common Cause | Simple Solution |
|---|---|---|
| Planks Won’t Click Together | Improper angle or damaged locking edges | Align carefully and click planks together at the recommended angle |
| Gaps Between Planks | Uneven installation or temperature changes | Reconnect the planks and maintain proper room temperature |
| Floor Feels Uneven | Subfloor is not level | Clean, repair, and level the subfloor before installation |
| Planks Separate After Installation | Loose locking joints or movement | Check connections and reinstall affected planks |
| Bubbling or Lifting | Moisture or expansion pressure | Check moisture levels and allow proper expansion space |
| Scratched Planks | Rough handling or debris underneath | Keep the work area clean and handle planks carefully |
| Click-Lock Damage | Excessive force during installation | Avoid hammering or forcing the locking system |