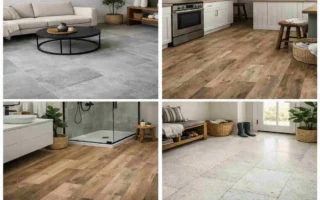
A DIY epoxy kitchen floor can give your kitchen a clean, modern, and long-lasting finish. It looks seamless, resists spills, and is easier to clean than many other flooring types.
If you are a beginner, the good news is that you can do this project at home. But it only works well when you properly prepare the surface, mix the product carefully, and allow sufficient curing time.
What Is a DIY Epoxy Kitchen Floor?
Understanding Epoxy Flooring
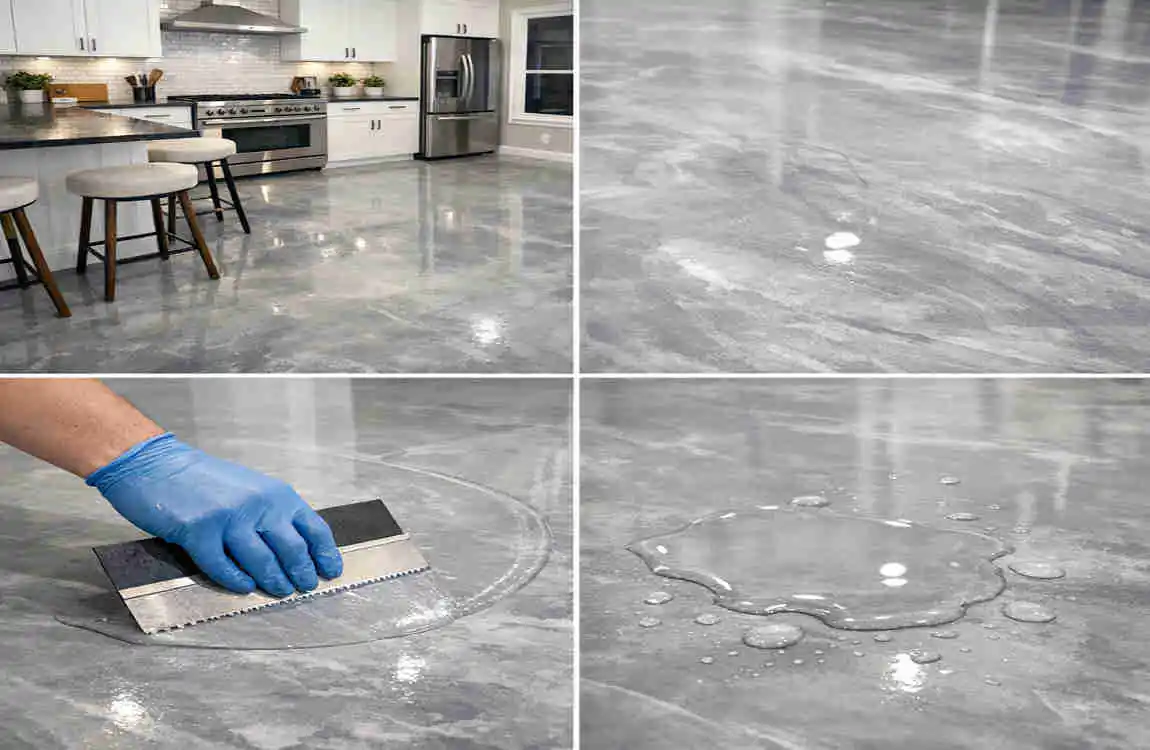
Epoxy flooring is made by mixing resin and hardener. When these two parts combine, they create a strong coating that bonds to the floor surface.
This coating becomes hard, durable, and smooth once it cures. That is why it is often used in kitchens, garages, and utility spaces.
Why Use Epoxy in a Kitchen?
A kitchen floor gets a lot of daily use. Food spills, water splashes, foot traffic, and dropped items are all common.
Epoxy works well because it is:
- Easy to clean
- Resistant to stains
- Strong and durable
- Available in many colors and finishes
It also gives the room a neat, polished look.
Is Epoxy Flooring Good for Kitchens?
Yes, epoxy can be a very good choice for kitchens. It handles moisture well and stands up to everyday use.
Still, there are a few things to keep in mind. A very smooth surface can be slippery when wet, and poor installation can lead to peeling or bubbling. That is why preparation matters so much.
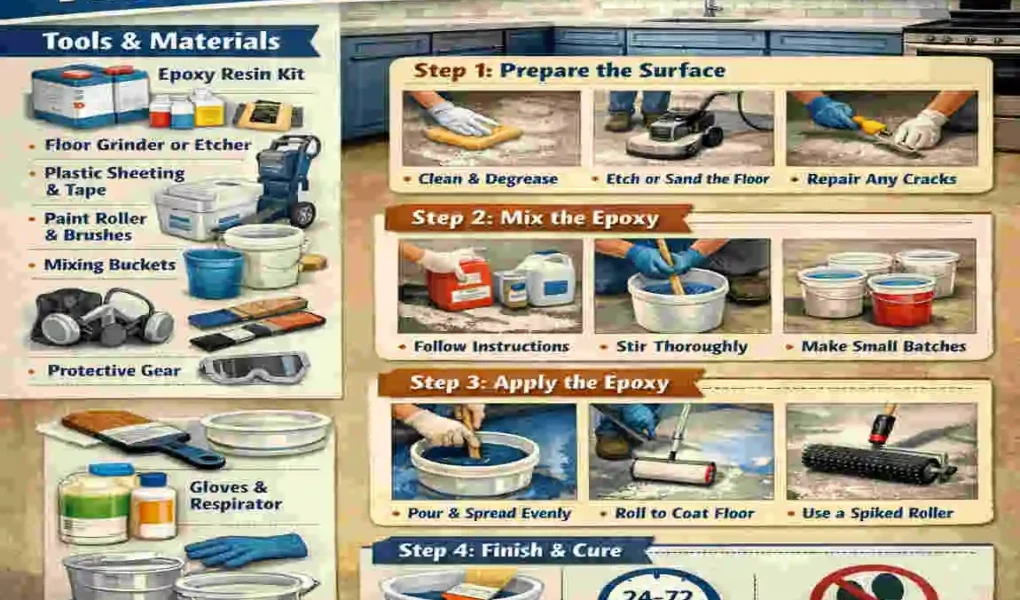
Materials and Tools You Need
Essential Materials
Before you begin, gather the main supplies:
- Two-part epoxy coating
- Primer if the product requires it
- Floor cleaner or degreaser
- Crack repair compound
- Mixing containers
- Epoxy-safe roller
Safety Equipment
Safety matters as much as the floor itself.
You should have:
- Gloves
- Safety glasses
- Protective clothing
- Respirator if needed
- Good ventilation
Helpful Tools
These tools can make the job easier:
- Floor scraper
- Sanding or grinding tool
- Paint tray
- Measuring tools
- Mixing paddle
- Painter’s tape
Preparing the Kitchen Floor
Clear the Room
Move furniture, rugs, and small appliances out of the way. If possible, temporarily remove large appliances too.
You want a fully open work area before you begin.
Clean and Degrease the Surface
This is one of the most important steps. Epoxy will not bond well to dirt, grease, or old residue.
Clean the floor carefully and let it dry completely.
Repair Cracks and Damage
Fill holes, chips, and cracks with the right repair material. A smooth base gives you a better final finish.
Let the repairs cure fully before moving on.
Sand or Roughen the Floor
Epoxy needs a surface it can grip. If the floor is glossy or too smooth, the coating may not stick properly.
Light sanding or grinding helps create that bond.
Check for Moisture
Too much moisture can ruin the floor. It may cause poor adhesion or peeling later.
Always check that the floor is dry and suitable for epoxy before applying anything.
How to Apply a DIY Epoxy Kitchen Floor
Read the Product Instructions
Different epoxy products behave differently. Do not guess the mixing Ratio or drying time.
Follow the label for:
- Mixing instructions
- Coverage rate
- Working time
- Recoat time
- Curing time
Apply Primer if Required
Some floors need primer for better bonding. If your product recommends it, use it.
Let the primer cure as directed before adding epoxy.
Mix the Epoxy
Combine the resin and hardener slowly and carefully. Mix only the amount you can use within the working time.
Do not overmix, because that can trap air bubbles.
Apply the First Coat
Work in small sections and apply an even coat.
Use the recommended roller or squeegee, and keep the thickness consistent.
Add Decorative Effects
This step is optional, but it can improve the look of your floor.
You may add:
- Color flakes
- Metallic effects
- Decorative texture
Apply a Topcoat
A clear topcoat can add extra protection and improve the finish. Make sure it is compatible with your epoxy system.
How Long Does It Take to Cure?
Drying vs. Curing
A floor may feel dry to the touch before it is truly ready. That does not mean it is fully cured.
Always follow the manufacturer’s timing.
When Can You Walk on It?
Light foot traffic may be allowed after a certain period, but avoid rushing this step.
When Can Appliances Go Back?
Heavy appliances should wait until the floor is fully cured. Moving them back too early can damage the coating.
Common Mistakes to Avoid
Skipping Surface Preparation
This is the biggest mistake. If the floor is dirty or smooth, epoxy may not stick well.
Applying to a Damp Floor
Moisture can cause major bonding problems.
Mixing Incorrectly
Wrong ratios can leave the coating soft, sticky, or uneven.
Making the Coat Too Thick
Too much epoxy at once can create curing problems and a messy finish.
Ignoring Temperature and Humidity
The room conditions matter. Always work within the product’s recommended range.
Walking on the Floor Too Soon
Give the floor enough time to harden before using it normally.
Poor Ventilation
Keep air moving and follow safety instructions carefully.
How to Make the Floor Safer
A kitchen floor should not just look good. It should also feel safe.
You can improve safety by:
- Using a slip-resistant additive
- Choosing a textured topcoat
- Placing mats in wet areas
- Cleaning spills right away
A very glossy floor can look nice, but it may be slippery when wet.
DIY Epoxy Kitchen Floor Design Ideas
Solid-Color Epoxy
This is a simple and clean option. Neutral shades work well in most kitchens.
Flake Epoxy Flooring
Decorative flakes add texture and help hide small bits of dirt.
Metallic Epoxy
This creates a bold, eye-catching look. It can be beautiful, but it usually needs more skill.
Gray Epoxy
Gray is popular because it pairs well with many cabinet, counter, and wall colors.
High-Gloss vs. Satin
- High-gloss looks bright and polished
- Satin looks softer and may be easier to live with
Choose the finish that fits your style and practical needs.
How to Maintain an Epoxy Kitchen Floor
Regular Cleaning
Sweep or vacuum the floor often. Use a mild cleaner and avoid harsh chemicals unless the product allows them.
Deal With Spills Quickly
Food, oil, and liquids should be wiped up as soon as possible.
Prevent Scratches
Use furniture pads and lift heavy items instead of dragging them.
Inspect the Surface
Look for cracks, chips, or peeling from time to time. Small problems are easier to fix early.
DIY Epoxy Kitchen Floor vs. Other Flooring Options
FeatureEpoxy FlooringVinyl FlooringTile FlooringLaminate Flooring
Seamless appearance Excellent Limited No Limited
Easy cleaning Excellent Very good Very good Good
Water resistance High when installed well High High Varies
DIY difficulty Moderate Moderate Moderate to high Moderate
Design options Many Many Many Many
Maintenance Low Low Moderate Low
Epoxy stands out for its smooth, seamless finish and ease of cleaning.
How Much Does a DIY Epoxy Kitchen Floor Cost?
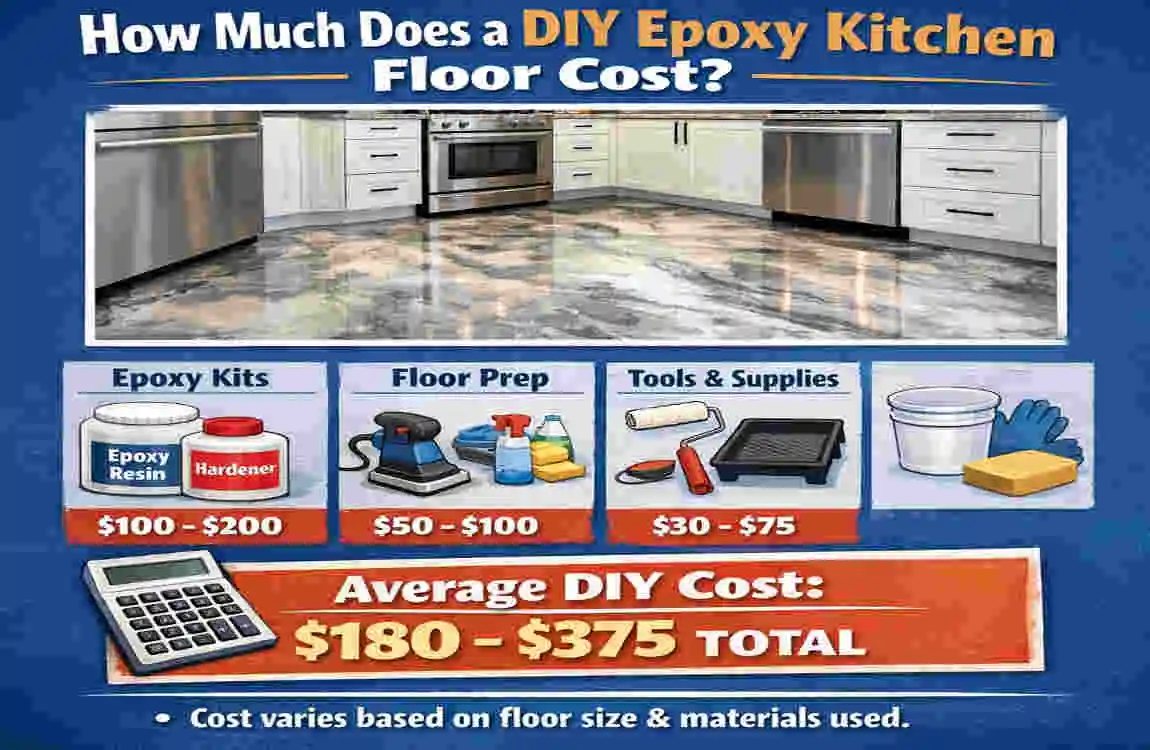
The cost of a DIY epoxy kitchen floor depends on several things:
- Size of the kitchen
- Quality of the epoxy
- Amount of surface repair needed
- Primer and topcoat use
- Decorative effects
- Tools and safety equipment
DIY can save money on labor, but preparation and materials still matter.
When Should You Hire a Professional?
You may want professional help if:
- The floor has serious damage
- Moisture is a problem
- The old coating is hard to remove
- The floor needs heavy grinding
- You are unsure about product compatibility
- You want a complex decorative design
Frequently Asked Questions
Is a DIY epoxy kitchen floor a good idea?
Yes, if you are comfortable with careful preparation and following instructions.
Can I put epoxy directly over my kitchen floor?
Not always. The surface must be clean, dry, and compatible.
How many coats do I need?
That depends on the product system. Follow the manufacturer’s guide.
Is epoxy slippery?
It can be. A slip-resistant additive can help.
How long does it last?
A properly installed epoxy floor can last many years with good care.
| Section | Key Information |
|---|---|
| DIY Epoxy Kitchen Floor | A durable, glossy flooring option that can refresh an old kitchen floor. |
| Best Surface | Works best on clean, dry, smooth concrete or properly prepared existing floors. |
| Materials Needed | Epoxy resin, hardener, floor cleaner, roller, mixing bucket, gloves, and painter’s tape. |
| Preparation | Remove furniture, clean grease and dirt, repair cracks, and lightly sand if needed. |
| Application | Mix the epoxy according to the manufacturer’s instructions and apply evenly with a roller. |
| Drying Time | Allow the recommended curing time before walking on or placing heavy appliances on the floor. |